Purpose & Goal
Learning web development can be tough with so many patterns, ideas, and workflows to keep track of. Just as I got comfortable with React, I discovered NextJS 13+ and server actions, which felt overwhelming 🤯.
To tackle this, I challenged myself with a project focused on mastering NextJS, server-side rendering, and using client components only when necessary. I also aimed to improve my Tailwind skills and work from design specs.
Luckily, I found a project that combined all my learning goals. I used designs from the JSM team and expanded on them to create a full-stack app. This app helps me keep track of useful information on my web development journey, like a searchable 'external brain' for web development.
You can check out the project by logging in with the example account:
email: sirius.black@hogwarts.edu
password: 123123
Some Features & Technical Details
Multi-step & Conditional Forms
In this project, I focused on enhancing my form-building skills by creating both a multi-step onboarding form and a conditional form (one that renders parts of the form based on certain conditions). Through this, I learned a lot about form validation and the power of react-hook-form and zod.
Multi-step form
I worked from design specs that envisioned a LinkedIn-style onboarding form for the user.
At first, I wasn't sure how to approach this. I had a vague idea about using searchParams, but it did not work inside a client component.
Then, I realized I could leverage searchParams in a higher-level server component (my onboarding route) and pass them down to my OnboardingForm component (which needs to be a client component to hold the state). This way, I could conditionally render each step using searchParams.
Here is a snippet of the onboarind page component, which handles the user flow after authentication:
// (auth)/onboarding/page.tsx
...
const Onboarding = async ({
  searchParams,
}: {
  searchParams: { [key: string]: number };
}) => {
  ...
  const steps = [
    "Basic Information",
    "Add your learning goals",
    "Add your knowledge level",
    "Schedule & Availability",
  ];
  return (
    <div className=" mx-auto bg-myBlack-800 p-8 lg:w-3/4">
      <ProgressStepBar steps={steps} currentStep={searchParams?.step} />
      <h2 className="mt-4 text-display2 text-myWhite-100">
        {steps[searchParams?.step - 1]}
      </h2>
      <OnboardingForm session={session} step={searchParams?.step} />
    </div>
  );
};
...
As you can see, I read the step from searchParams on the server and pass it down to the client-side form an progress bar. The form then conditionally renders the appropriate step:
//components/.../OnboardingForm.tsx
...
const OnboardingForm: React.FC<OnboardingFormProps> = ({ step, session }) => {
  step = Number(step);
   ...
  const stepComponents = {
    1: (
      <Step1
        register={register}
        control={control}
        session={session}
        setNextButtonDisabled={setNextButtonDisabled}
      />
    ),
    2: <Step2 register={register} control={control} session={session} />,
    3: <Step3 register={register} control={control} session={session} />,
    4: <Step4 register={register} control={control} session={session} />,
  };
return (
    <form
      onSubmit={handleSubmit(onSubmit)}
      className="mt-4 flex flex-col gap-4"
    >
      {stepComponents[step as keyof typeof stepComponents]}

     ...//conditionally render a Next or Submit button
    </form>
  );
...
The final result is a different step at a different URL, but it's all part of one form!
In the end, this looks simple, but it was a lot of new concepts to me. Doing this allowed me to keep things well-decomposed and to better understand client-side vs server-side rendering!
Form with conditional but required properties
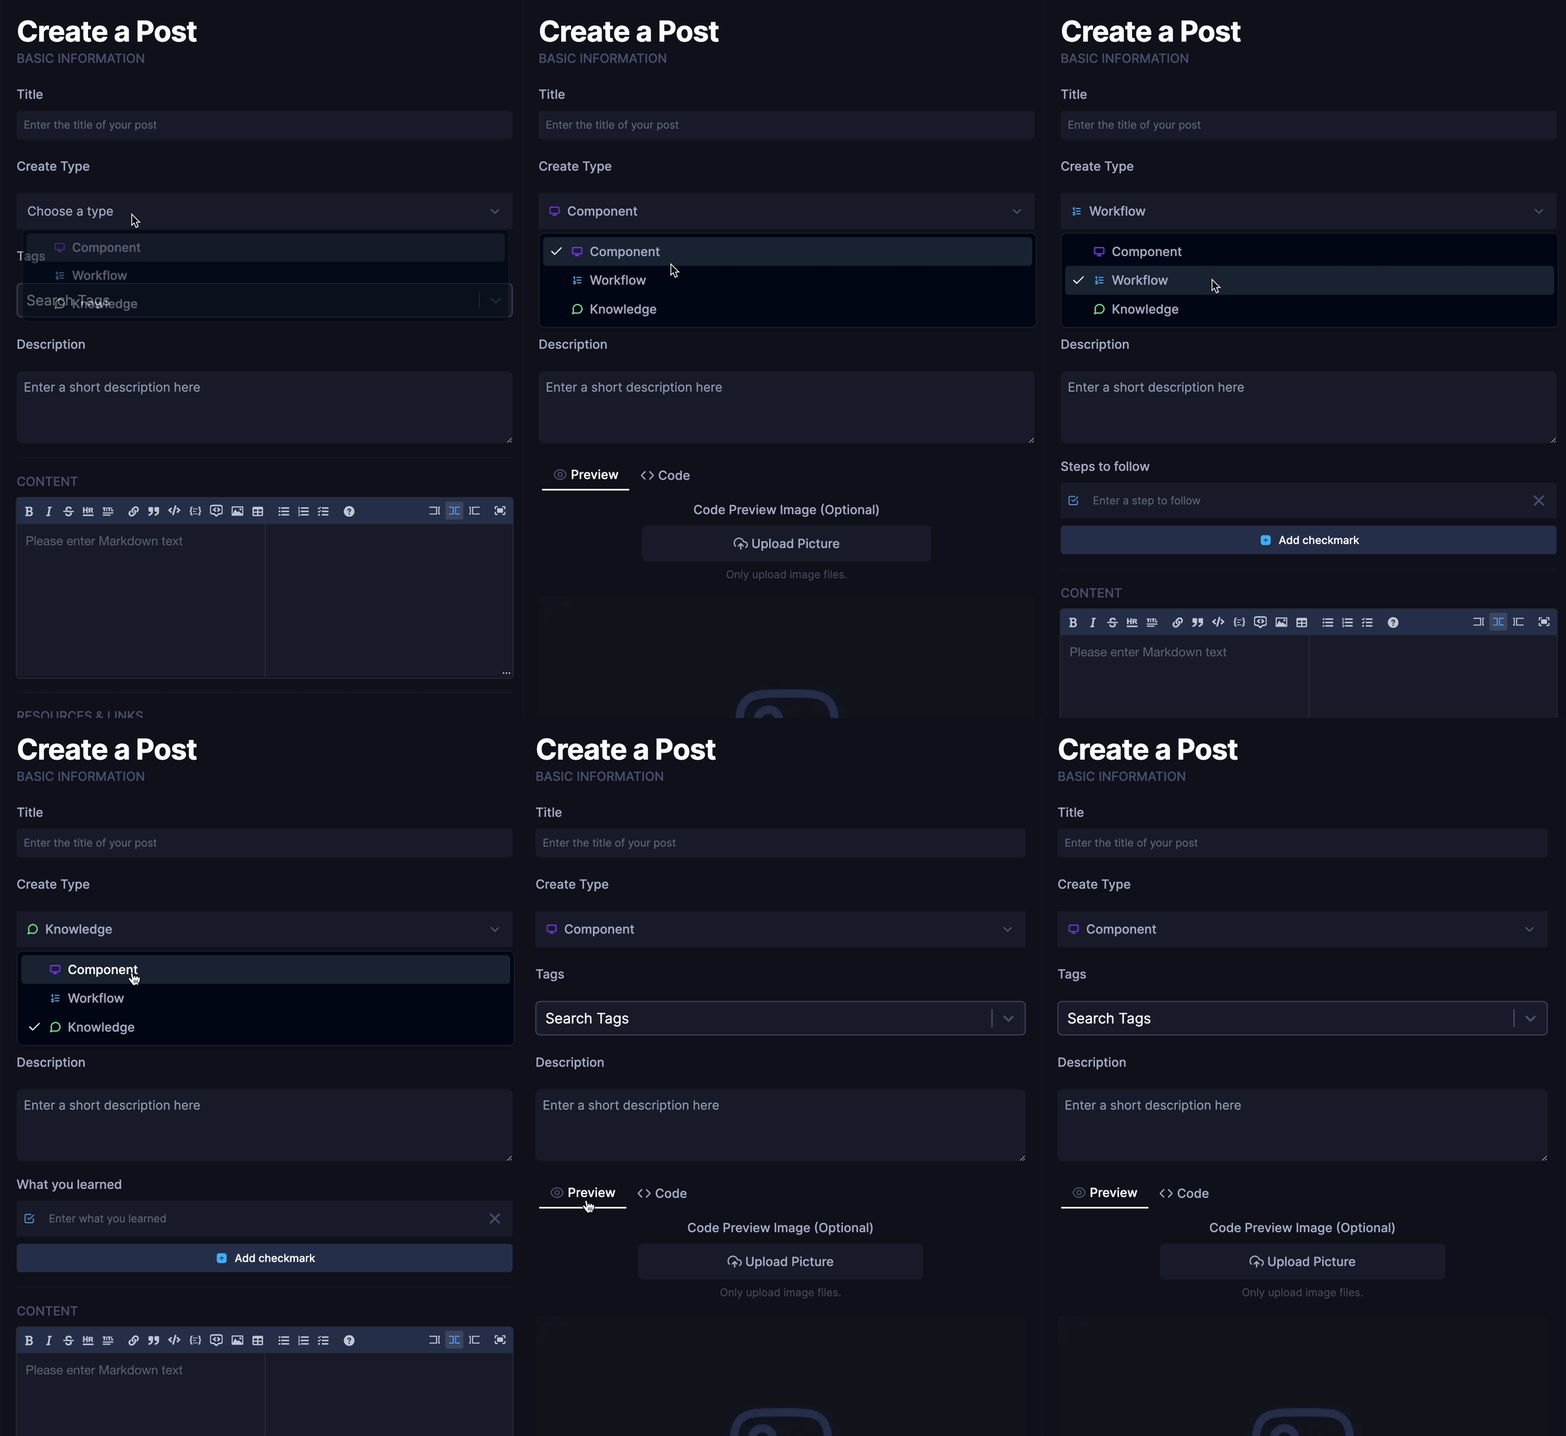
The core of the product involves being able to create "Notes" for someone to build their own knowledge repository. Notes can be of three types: Workflow, Knowledge, and Component.

I knew how to conditionally render based on the user's choices, but I wasn't sure how to handle form validation with that. Managing all that state seemed like a headache.
Thankfully, I discovered react-hook-form, which made this process easy. It allowed me to register and unregister different fields with a simple useEffect.
//components/.../CreatePostForm.tsx

const CreatePostForm: React.FC<CreatePostFormProps> = ({ tagsString }) => {
  ...
  const {
    register,
    watch,
    handleSubmit,
    control,
    setValue,
    unregister,
    formState: { errors },
  } = useForm(...);

  const watchType = watch("type");
  useEffect(() => {
    if (watchType === "component") {
      register("code");
      setValue("code", "");
      unregister("stepsToFollow");
      unregister("whatYouLearned");
    } else if (watchType === "workflow") {
      register("stepsToFollow");
      setValue("stepsToFollow", []);
      unregister("code");
      unregister("whatYouLearned");
    } else if (watchType === "knowledge") {
      register("whatYouLearned");
      setValue("whatYouLearned", []);
      unregister("code");
      unregister("stepsToFollow");
    }
  }, [watchType, setValue, unregister, register]);
...
}
Hooray for react-hook-form's watch!
Explore Page: leveraging server actions
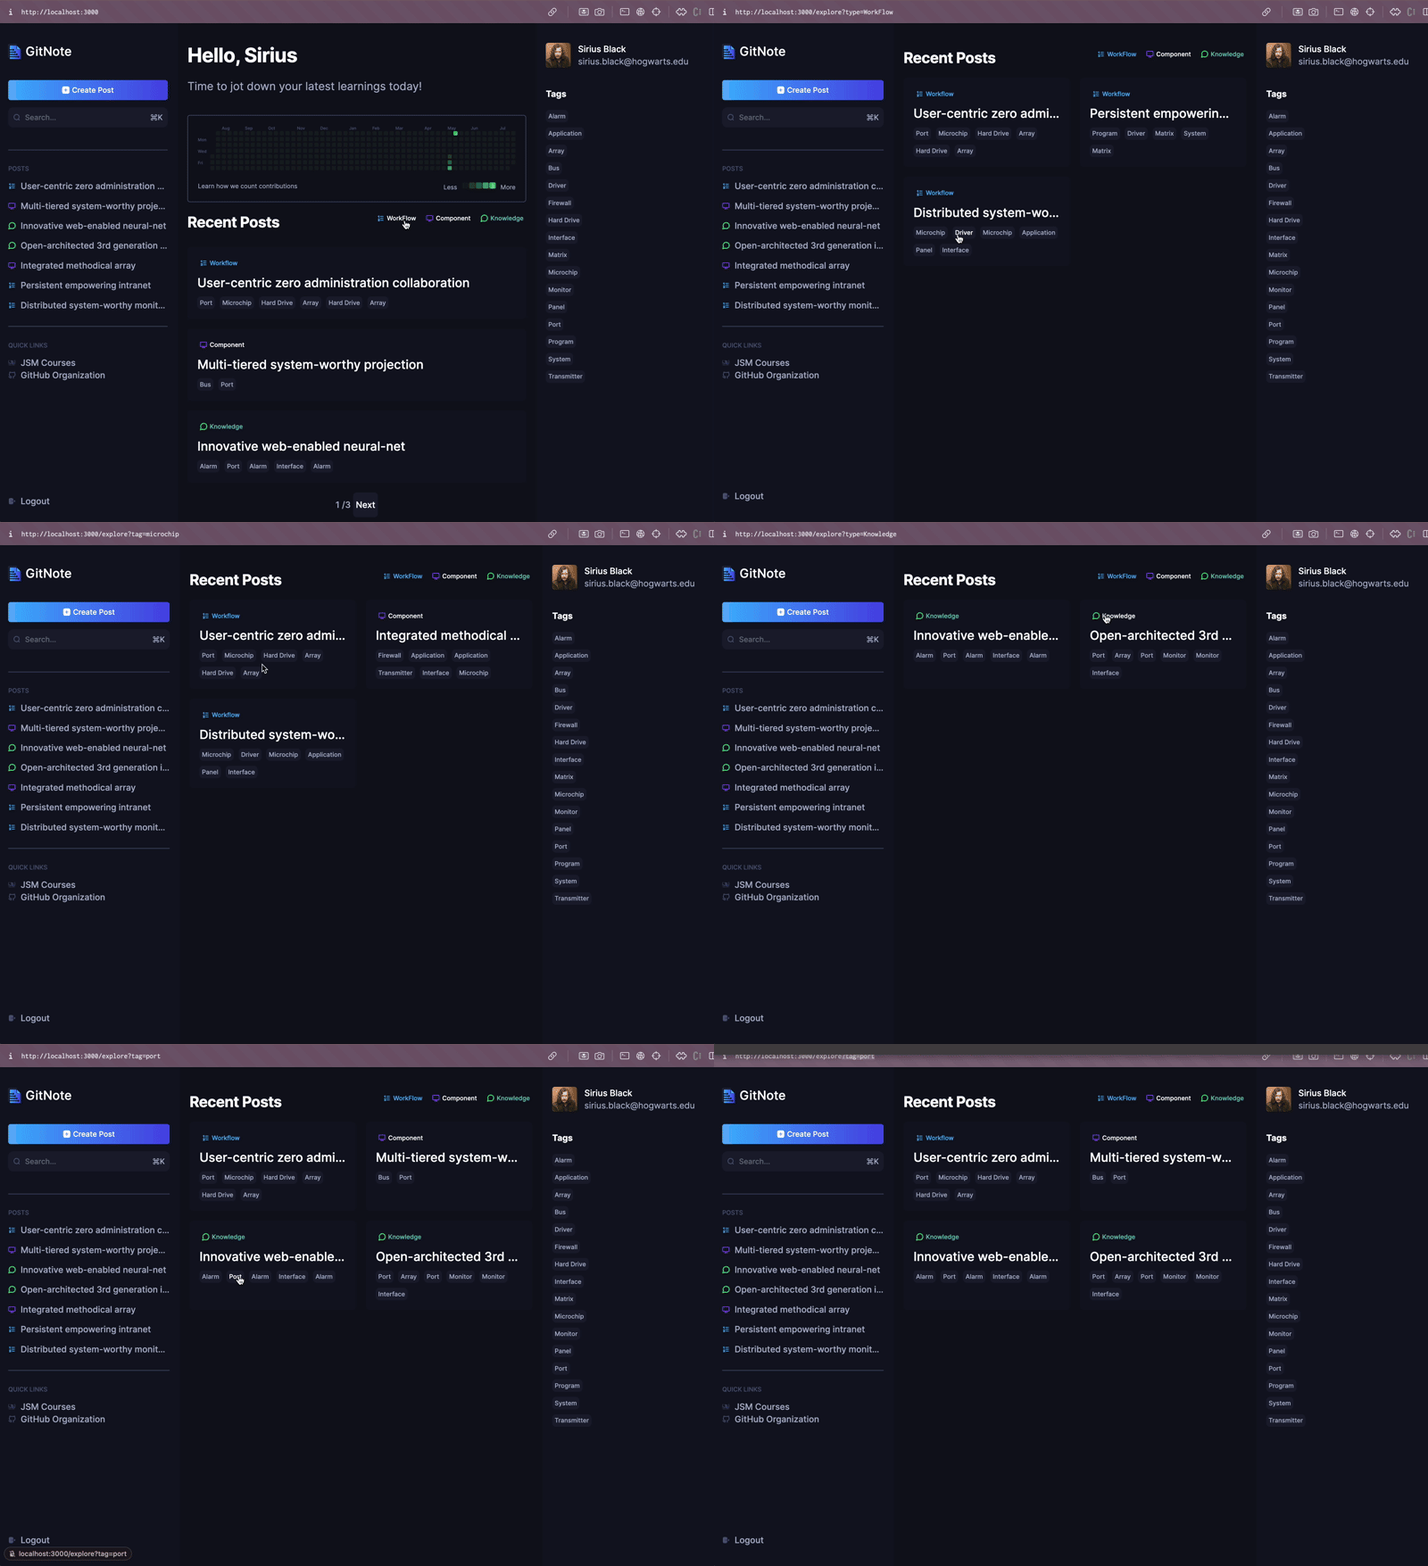
Another area I wanted to leverage Server-Side Rendering was the Explore section. When the user selects a filter, they'll see posts of that type (or with that tag). Previously, I would have loaded all posts on the client-side and filtered them. However, I knew this wouldn't take advantage of NextJS's features.

My solution involved the Explore page calling a server action (below) to filter posts either by type (note type) or by tag. This way, I'm not filtering client-side or holding many posts in client-side memory—the server handles the heavy lifting! It took some time to get this working, but my code is now smoother and cleaner.
//lib/actions/posts.ts

async function _getPosts(filterType: PostType, tag: string, id: string) {
  await connectToDB();
  //get the posts of the user from the database
  const filteredPosts = await Note.find({
    creator: id,
    ...(filterType !== undefined && { type: filterType.toLowerCase() }),
    ...(tag !== "" && { tags: { $in: [tag] } }),
  });

  return filteredPosts;
}
...
export const getPosts = cache(_getPosts, ["get-posts"], {
  tags: ["posts"],
});
Overall, this project really helped me internalize when to use Server-Side rendering and when not to!
Command Palette Search
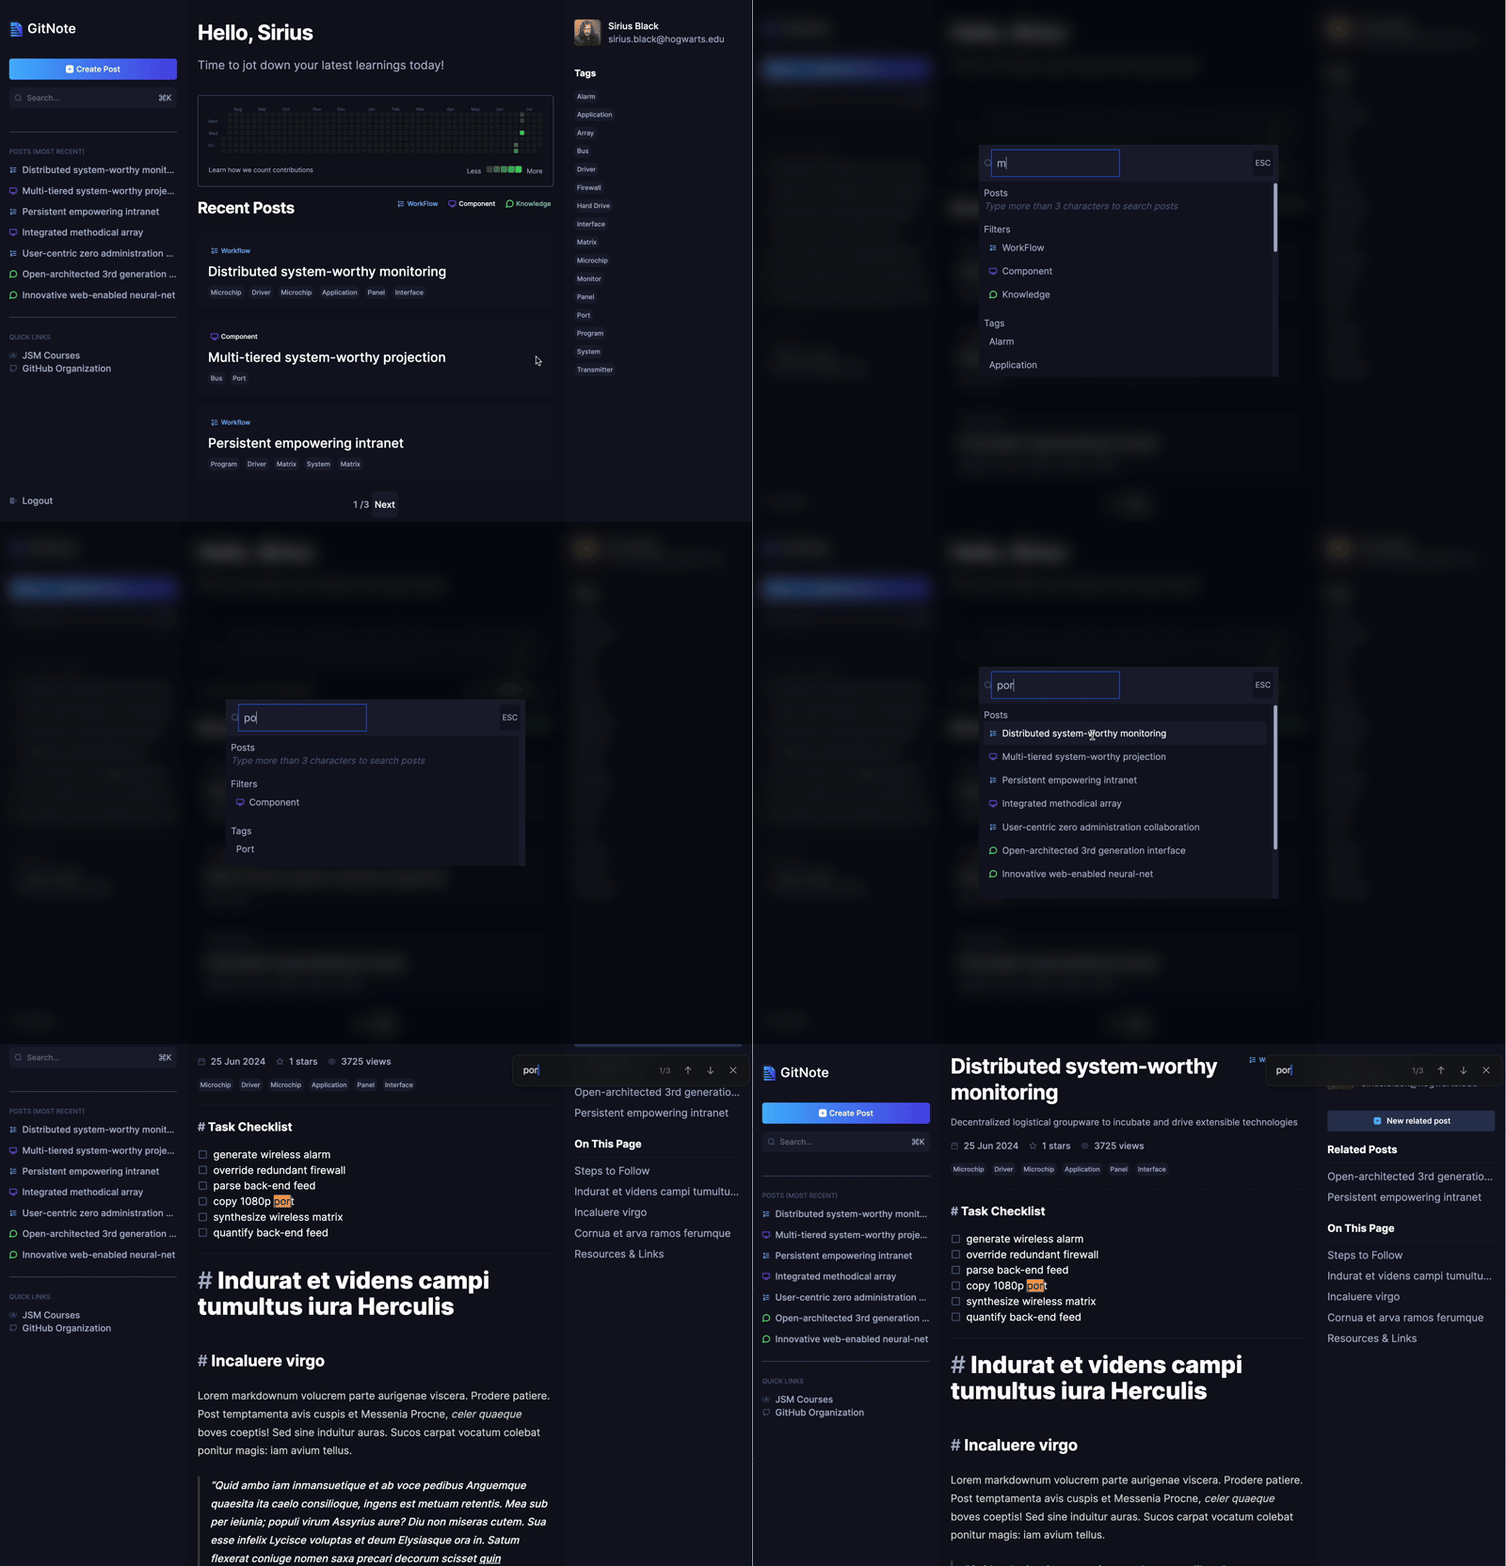
One final cool feature I'm proud of in this project is implementing a ⌘ + K command palette to search for the notes in the app, using the cmdk npm package. This feature is just cool, honestly, I just feel legit when opening up a command palette with cmd+ k on this app.

The documentation for this is really good and overall, the package is just really awesome and composable. I can't say enough good things about it!
I did have some issues in having the user's filter type, tags and posts all be searchable within the command palette. Especially with the posts, I knew that if a user had many posts, you would not initially want to load all of them. Ideally, you only want to load any relevant posts as the user searches. I wasn't sure how to do that with the built-in filtering provided.
What I ended up doing is implementing my own filtering/search with server actions.
First, you have to remove the built-in filtering (shouldFilter={false}):
//components/.../CommandPalette.tsx
const CommandPalette: React.FC<CommandPaletteProps> = ({props} ) => {
    return (
    <div>
     ...
            <Command className="rounded-sm bg-myBlack-900" shouldFilter={false}>
                ...
            </Command>
      </div>
            ...
        );
};
...
Then, I debounced a server action inside my component that would leverage my database to do the searching in the notes.
//components/.../CommandPalette.tsx

useEffect(() => {
    const getMatchingPosts = async () => {
      setIsLoading(true);
      const relevantPosts = await searchPosts(searchTerm);
      setMatchingPosts(relevantPosts);
      setIsLoading(false);
    };
    const getMatchingFilters = () => {
      const filters = postFilters.filter((filter) =>
        filter.type.toLowerCase().includes(searchTerm.toLowerCase())
      );
      setPostFiltersToShow(filters);
    };

    const getMatchingTags = () => {
      const filteredTags = allUserTags.filter((tag) =>
        tag.toLowerCase().includes(searchTerm.toLowerCase())
      );
      setTags(filteredTags);
    };

    const timeoutID = setTimeout(() => {
      getMatchingPosts();
      getMatchingFilters();
      getMatchingTags();
    }, 200);
    return () => {
      if (timeoutID) clearTimeout(timeoutID);
    };
  }, [searchTerm, allUserTags]);
This way, you can search not just the title of the post, but the whole body of the post, as you can see in the git. This useEffect call above calls this server action with the searchTerm :
//lib/actions/posts.ts
async function _searchPosts(searchTerm: string) {
  await connectToDB();

  if (searchTerm.length < 3) {
    return [];
  }

  try {
    const posts = await Note.find({
      $or: [
        { title: { $regex: searchTerm, $options: "i" } },
        { description: { $regex: searchTerm, $options: "i" } },
        { content: { $regex: searchTerm, $options: "i" } },
      ],
    }).sort({ createdAt: -1 });

    return JSON.parse(JSON.stringify(posts));
  } catch (error) {
    console.log(error);
    return null;
  }
}
Debouncing it every 200 milliseconds ensured it did not fire too fast! Overall, this was a really satisfying little feature to add!
Lessons Learned
This project was huge for my own development. I learned a ton! Here are some top-level takeaways.
- Technical:
- Don't reinvent the wheel: I spent a lot of time at first spending much too long making my own components for everything. No longer. Once I got over the initial hurdle of using shadcn, I never want to go back.
- Server Actions: Take advantage of what the databse is good for, which includes querying!
- Spend time up front: I had some trouble getting started. I was itching to get going that I sped through setting up a proper ts config for the design. I later regretted it when I tried to include shadcn. It's often better to spend time planning everything out instead of getting started down a worse path.


